Understanding Your Sourdough Starter
Author: Admin Date Posted:20 October 2024

Get your sourdough starter started! This article will explain the basics, and walk you through the steps needed to make and maintain your sourdough starter from scratch.
There are many ways to make a sourdough starter, and different types of sourdough bread can be made with starters of different flours. This article will explain the basics, and walk you through the steps needed to make and maintain your sourdough starter from scratch. By the end of this guide, you will have everything you need to take the next step towards making delicious and nutritious sourdough bread.
What is a Sourdough Starter?
A sourdough starter begins life as a pot of water and flour. I say begins, yet strictly speaking flour is already full of life. It simply needs the right conditions in which it can flourish. Everything you need to make life-sustaining bread is right there within the grain itself. All you have to do is add water.
What this becomes is a colony of symbiotic microbes. Which, admittedly, doesn't sound great. But these microbes are what make your bread rise, make it taste like real bread, AND nurture your own colony of symbiotic microbes. Because the latest thinking on gut health suggests that we as humans are just that.
Your sourdough starter is made up of wild yeasts and lactic acid bacteria (LAB) that are collectively known as microbes. LAB are key to the fermentation process; we have heard about them before, when we have talked about the benefits of kombucha, or yogurt, for example.
The bacteria produce organic acids that transform the dough into something delicious, nutritious, and digestible. The yeasts produce the gases that make the bread rise. We call it a symbiotic colony because the yeasts and the bacteria work together.
Beyond these universal similarities, each sourdough starter is made up of a combination of individual microbes that are unique to its environment. So whilst they share the same basic characteristics, each starter is completely different.
Is it worth making your own sourdough starter?
Absolutely it is. Using an established starter, either store-bought or inherited, may give you more consistent results, which in turn can boost confidence, but making your own really does help you to get in touch with the process.
How long does a sourdough starter take?
Making a sourdough starter from scratch can take anywhere from 3 days to 2 weeks, depending on the temperature of the room and the microbes already present in the flour. There's no need to rush. If you plan for your first bake in 2 weeks and your starter is ready early then you can either bake earlier than planned or store the starter in the fridge.
The last thing you want to do is stress over it. Being impatient about it won't help matters much either.
What size jar for sourdough starter?
We use a straight-sided 850ml Weck Jar as it is widely recommended.
What flour to feed sourdough starter?
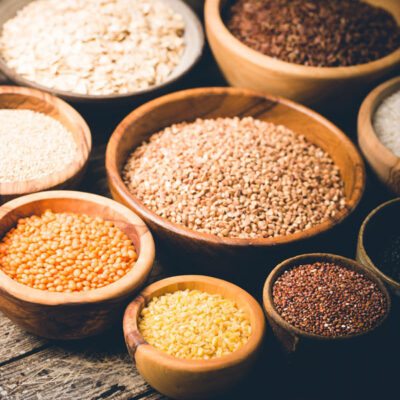
You can make, and feed, a starter with most flours made from gluten-containing grains. You could use strong white bread flour or wholemeal bread flour. The 'classic' sourdough starter is made from rye flour. Which is what we use here.
Rye flour has a distinctive flavour and is generally more nutritious than wheat. It also tends to have higher levels of enzymes which means it will ferment quickly.
A white starter will have a sweet milky flavour whilst a rye starter will have deeper sour notes and greater complexity. Wholegrain wheat flour will introduce a more yeasty malty flavour, like beer.
Read more about rye flour, the ancient grain for modern bakers.
How to Make a Sourdough Starter.
So you've got your jars, your flour, and your water. And a rough schedule in mind. Oh, wait, a quick word about water. You can use any kind of water you like for your starter but tap water is just fine. If you use a water filter then that is ideal.
Whisk together 150g rye flour with 150g water (warmed to 28 degrees C). If using a Weck jar, place the glass lid on the top. Otherwise, use a breathable cover such as a coffee filter secured with an elastic band. Whatever you use to cover it needs to allow the gases inside the jar to escape.
Leave in a warm place for 12 to 24 hours at an optimal temperature of between 26 to 30 degrees C. It will work at cooler temperatures but it will ferment more slowly.
According to your schedule, you can feed your starter every 12 hours. At 8 am and 8 pm for instance. Or you can feed it once a day, in the morning or the evening. To do this, discard half from the jar, and whisk in 75g rye flour and 75g water (28C).
Keep doing this every day until it shows all the signs of being ready.
Use our organic wholemeal rye flour
What should sourdough starter smell like?
A healthy sourdough starter should have a pleasantly tangy, slightly yeasty aroma.
When you first begin the process, the smell will be milder and flour-like, but as the starter matures, you should detect a balance of sweet, tangy, and slightly alcoholic scents. If your starter smells distinctly like nail polish remover or has an overpowering off-putting odour, it could be a sign of undesirable bacteria or yeast, and you might need to start over.
If your starter smells slightly strange after the first few days, just carry on and give it a chance to settle. Chances are this is simply the good and bad bacteria in a battle for control.
How do I know when my sourdough starter is ready?
Your starter is ready when it shows consistent, predictable even, signs of fermentation each day.
Somewhere around day 2 or 3, you may see a flurry of activity, where your starter suddenly seems to spring to life. And then appears to die. Don't worry, it is probably fine. Just carry on and it should settle over the next day or two.
Once it has settled, you will see a predictable pattern of rise and fall. You will see bubbles on the surface as well as the sides and it will have a looser consistency. The smell will be pleasantly sour, and a little sweet and yeasty.
How to Store Sourdough Starter?
Unless you are constantly feeding your starter, which generally means you are baking every day, then you will store your starter in the fridge. This gives you the flexibility to feed it less often, according to your baking schedule.
When to put sourdough starter in the fridge?
With a newly created starter (as opposed to a refreshed one) then you wouldn't put it in the fridge until it shows all the signs of being ready, as we previously discussed.
With a refreshed starter it doesn't really matter at which point you put it in the fridge. To a certain degree, your starter needs to follow your schedule and fit in with your life. That said, when you are on a baking schedule, the starter that goes back into the fridge will be the one that is part of your baking routine. You will have removed a portion to make your leaven when it is at its microbial peak. What remains, will immediately go into the fridge.
We will be looking at preparing the leaven next time.
How long can you keep the sourdough starter in the fridge?
A sourdough starter should survive in the fridge without feeding for up to two months. However, the longer you leave it, the more attention it will need to bring it back to life.
Ideally, it should be fed from the fridge once a week. But if you don't bake each week then this becomes an unnecessary chore. Or there may be times when you are away from home for several weeks.
If you bake once a week, then you will feed your starter the morning before the day you bake. If you bake once every two weeks then you may need an additional feed 12 hours before that. The longer you leave it in the fridge between feedings, the more times you will need to feed it before you bake. Each with at least 12 hours in between. So you will need to plan your baking schedule accordingly.
Why is my sourdough starter runny?
When you first feed a starter, especially with wholemeal flour, it will be quite stiff and paste-like. As it ferments, it does get runnier. Depending on when it was last fed, it may even form a layer of liquid on the top known as hooch. This is completely harmless, and you can just pour it off when you next feed the starter.
How to Maintain Sourdough Starter?
As we mentioned before, the maintenance of your starter largely depends upon how often you bake. Yes, as a living thing, it can die, but there is no need to mollycoddle it excessively. If you want to feed it once a week, then, by all means, do so.
Strictly speaking, the term for maintaining your starter is 'refreshing'. Many people use the term 'feeding' as it accurately describes the process and in many ways, it bears similarity to caring for a pet. Reactivating means pretty much the same thing, although the term more accurately describes bringing it fully back to life and encouraging optimal microbial activity.
How to feed sourdough starter from the fridge?
To feed your starter from the fridge, take a clean jar. Add to it 100g water at 18C. Whisk in 25g of the starter you took from the fridge. Now, stir in 100g rye flour.
How long it takes to reach peak microbial activity will depend largely on the temperature of your room, the flour you are using, and the composition of your original starter. It could be anywhere between 5 and 12 hours.
It is useful if you can watch its progress to understand how it behaves under average conditions in your kitchen. Armed with that knowledge you will be able to make intuitive adjustments in the future. We describe this progress in the section that follows.
How to reactivate sourdough starter from the fridge?
Depending on how long your starter has stayed in the fridge between feedings then it may need more than one feed to reactivate it ready for baking. If you feel that it is not lively enough, then you can repeat the schedule from when you first created it, giving it subsequent 12-hour feedings.
Unfortunately, there is no surefire way of describing this process and is something you will learn to intuit for yourself. Through the experience of making bread using your sourdough starter, you will learn to understand how to best control the variables at play.
How to Use Sourdough Starter?
To use your sourdough starter, you first need to understand how it behaves. And also what it needs to do next.
When making sourdough bread, before you even begin to mix your dough, your starter needs to go through two stages. First, it needs to be adequately fed, or refreshed. Then, a portion of it is used to make your leaven. This is essentially the same thing as your starter but the whole thing is part of your bread recipe.
To make your leaven you need your starter to be at its microbial peak. Another name for this is 'ripe'.
When you feed the dormant starter, aerobic (in the presence of oxygen) activity begins.
At first, even for a few hours, it will likely do nothing at all, other than spread out into the jar as it loosens slightly.
Then, you will begin to see bubbles at the sides and the height will rise in the jar.
As aerobic activity picks up, the height may double, the sides will look bubbly, and if you look down into the jar you may see a few bubbles on top and the surface will be slightly domed.
At this point, it is easy to think that your starter is ready yet it probably has a bit more to give. It will continue to rise (probably quite quickly) and bubble until the top flattens out. Once the surface flattens out, oxygen is depleted and anaerobic (without oxygen) activity resumes.
The height will now drop and bubbles will show on the now flat surface. You don't want the height to drop completely. What you are actually looking for is the change in activity from rising to falling and those few telltale bubbles on the surface. That's when it is ripe. Beyond that, it becomes overly acidic to work with successfully.
At this stage, you will use a portion of the starter to create your leaven in readiness for baking. Or you will put the whole starter back in the fridge.
Because you will likely need to be on some kind of schedule for baking your loaf, you want the levain to be ready when you want it to be. Provided the conditions are similar, your levain will follow the same pattern and timescale as your starter. Which gives you an indication of when you need to prepare it to be ready at your chosen time. Roughly speaking. None of this will behave exactly according to an enforced schedule.
There are ways that you can manipulate how your starter is likely to behave. You can change the percentage of water that you use, and the temperature of the water you use. You can also change the temperature of the environment. In warmer climates, you may want to slow down the activity of your starter to allow more time to fit into your schedule. In this case, you can decrease the water content, and also the temperature. Should you need to slow things down then you can decrease the water temperature and see if you can find a cooler place to put your starter.
You can also change the flour you are using, but as we already mentioned, we do like to use a rye starter for many reasons. So when we move on to making the leaven, and then finally baking the bread, it is rye starter that we will be using. Generally speaking, rye and wholegrain starters will ferment more quickly than those made with white flour.
How soon after feeding the sourdough starter can I use it?
As we have seen, the time it takes for the starter to reach the point where it is ready for use is not something we can set the clock by. Don't forget, that after that you will need to repeat the process for the leaven to be ready. Only then will it be time to start preparing the dough.
We hope that you have found this guide to making a sourdough starter useful. See you next time when we explain what a leaven is, and why it is a fundamental part of your sourdough loaf.
Read the first part of this series: an introduction to sourdough bread.
Have you explored our range of healthy baking ingredients?